Friday, October 18, 2013

The Queen Bee, a Mixed Media Piece

While on a leaf-peeping excursion in New Hampshire, I came across a lovely antique shop in Petersburgh, Grove and Main.  I picked up some vintage glassware as well as a few pieces of ephemera.  Among the ephemera were 3 miniature porcelain dolls, one of which is featured in this mixed media craft.

Last weekend while my husband and I were sitting in our car in the parking lot of the mall I fell in love with a beautiful miniature maple tree with vibrant red and orange leaves.  I Googled it and discovered it's proper name is an Amur Maple.  I plucked a few branches and pressed the leaves.  I also used these in this mixed media piece.  While I was at it, I grabbed a few deep red leaves from a neighboring Fire Bush and included them in my creation as well.

I took an unfinished shadow box I purchased from Michaels and painted it with a mixture of acrylic paints in shades of coffee bean, vanilla & gold.  I whirled the colors with a sponge brush and applied it all over the box.  I then wadded up a paper towel and dipped back into the gold and dabbed it on here and there.  I then added an abstract scrapbooking paper with birds inside the box and dabbed some gold on it as well.


Then I began layering the dried leaves around the outside of the frame, making it heavier on the bottom right.  From there I added a ribbon and flower in the center and behind it placed the porcelain doll and added butterfly wings to make her a faerie.  I donned her with a bee to hide her nakedness and gave her a bronze crown as a finishing touch.  A brass butterfly, a flower with a crystal center, a feather and the words The Queen Bee all became a part of my creation.  I sprayed the entire piece with gold glitter spray.


I love creating mixed media art but sometimes have difficulty transferring my idea from my brain to the craft table.  This time, however, it came together well and I love the results!  Even though it has a fall feeling to it, I will keep it up all year round as I like it too much to put it away.


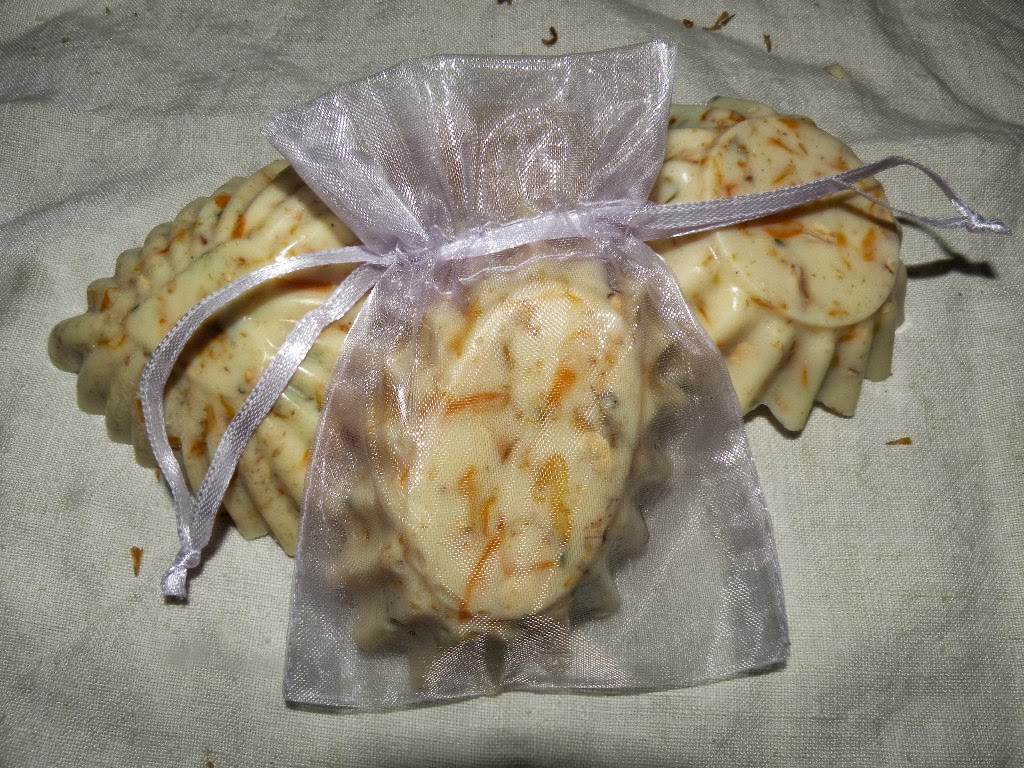
Calendula Oatmeal & Orange Glycerin Soap


This wonderful glycerin soap has honey as an astringent & moisturizer, oatmeal to relieve itchiness & gently exfoliate, marigold petals (calendula) soothe, and orange oil for a wonderful, clean scent.  They are very easy to make and ready in about 4 hours.  Package multiple in parchment paper or single in organza bags for gift-giving.  Keep a couple for yourself.  I know you will really enjoy them.  Here's how I made them ...

Ingredients:

1# block of castile soap base (I purchased my online at Bulk Apothecary)
3 T honey
5 T calendula petals (I purchased my online at Bulk Apothecary)
4 T old fashioned oats
10 drops orange essential oil (I purchased by online at Aura Cacia. You can also purchase from Bulk Apothecary)
Tartlet molds or tarlet pan with multiple molds
2-cup glass measuring cup w/spout or microwave safe bowl.  I prefer the measuring cup as it is easier to pour.
Cookie sheet
Spray bottle with rubbing alcohol

I used individual tarlet molds that I purchased on Amazon.com.  I find these easier to work with when it's time to release the soap.  However you can use a tarlet pan if you have one handy.  Oil the molds lightly with almond oil. On a cookie sheet, place a piece of waxed paper.  Place the molds on the cookie sheet and set aside.


Melt the soap base in a 2-cup glass measuring cup or microwave bowl or for approximately 2 minutes.  Check after 1 minute, stir, and return to microwave if needed.  Heat for 30 second intervals until mostly melted.  Remove and stir until completely melted.  Put the honey in a small bowl and microwave for approximately 20 seconds or until thin & runny.  Add to soap base.  Stir in calendula, oats and essential oil.

Pour soap mixture to the top of each greased mold.  You will most likely have some bubbles at the top of the poured mixture.  Take your bottle with rubbing alcohol and spray each mold with 1 quick pulse.  The bubbles magically disappear!


Let the soap mixture sit at room temperature for approximately 4 hours.  Carefully pull on the sides of each mold and pop the soap out.  If you are using a tartlet pan with multiple molds, run around the edge of each mold with a small sharp knife to coax the soap out.


Package the soaps to give as gifts or store in a cool, dry place for future use.


That's all the suds for now!


Thursday, October 17, 2013

Spiced Cakelets with Maple Buttercream

Ingredients:

1/3 c butter, softened
2/3 c granulated sugar
2 eggs
1 c flour
2 tsp ground ginger
1/2 tsp ground cinnamon
1/4 tsp baking soda
1/4 tsp baking powder
1/4 tsp salt
1/3 c sour cream
brown food coloring
orange food coloring
1 oz. bittersweet chocolate, melted

NordicWare Harvest Pan

Heat oven to 350*F. Grease and flour pan; set aside. In medium bowl, beat butter and sugar on medium speed until light and fluffy. Blend in eggs. Add flour, ginger, cinnamon, baking soda, baking powder and salt; blend on low speed 1 minute. Add sour cream and mix on medium speed until well blended. Divide batter into 4 equal parts. Divide first portion of batter among walnut-shaped well in pan. To second portion of batter, add 1 or 2 drops of brown food coloring; mix well. Divide this portion of batter among acorn-shaped wells. To third portion of batter, add 1 or 2 drops of orange food coloring; mix well. Divide this portion of batter among pumpkin-shaped wells. To last portion of batter, add melted bittersweet chocolate; mix well. Divide batter among pine cone-shaped wells. Bake for 10-15 minutes until toothpick inserted comes out clean. Cool 10 minutes in pan. Invert pan onto cooling rack and cool completely. If desired, shapes can be sandwiched together or acorn tops can be dipped in milted chocolate and rolled in finely chopped nuts.  Makes 24 cakelets.

**This recipe can be found on the inside of the label for the Nordic Ware Harvest Pan.

Maple Butter Cream

6 T butter, room temperature
3 oz. cream cheese, room temperature
1 c sifted confectioners' sugar
1 T pure maple flavoring
1-2 T milk

Beat butter and cream cheese until light and fluffy.  Add sugar and maple flavoring.  Add milk little at a time until desired consistency.


Whoopie!


Monarch Butterflies Are in Trouble - Please Read

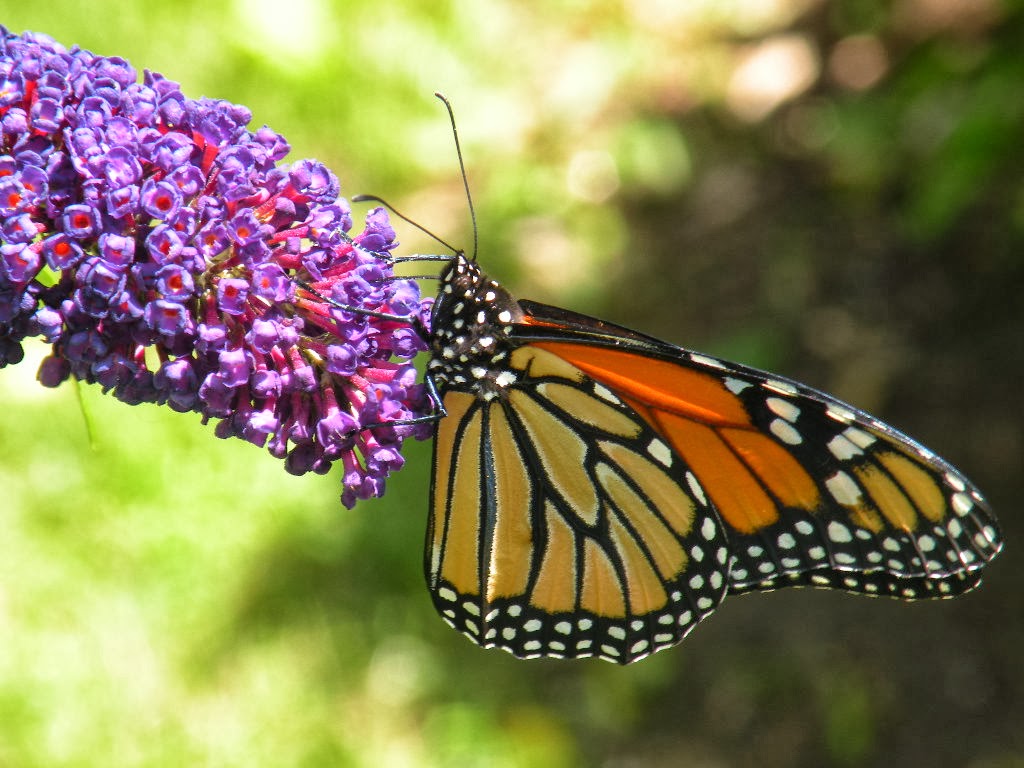
Sipping Nectar from a Butterfly Bush Bloom
Monarch Butterflies are the bright orange and black beauties that we think of most often when we imagine a butterfly in our mind or sketch it on paper.  They are the most recognizable of all butterflies, and their striking colors captivate us and draw us towards them to take a closer look.  Butterflies in general appear magical, like flying flowers, as they are so often referred to.  They are dainty and flutter so gracefully from flower to flower, we cannot help but be mesmerized by their mere appearance, and feel honored to be in their presence.

Sipping Nectar from a Milkweed Bloom


These wonderfully alluring creatures make quite a trip each year around October.  They take off from the gardens on the east coast and make their way to Mexico.  Monarchs have only ONE host plant and that is Milkweed (Asclepias).  We used to see it in abundance in wooded areas in our own backyards and along the roadways and forests.  Tall stalks with large elongated leaves rounded at the tips, which produce clusters of mauvy flowers in late spring/early summer.  Once the flowers have expired, the plant forms pods filled with seeds.  When the pods split open, masses of seeds attached to coma (silk-like material), are exposed and carried away by the wind, much like the dandelion.  NOW, since a majority of our woodlands are being wiped out to make way for houses, housing developments, shopping malls, etc., the milkweed plants are few and far between.  Not enough available for the adult Monarch to lay her eggs and begin the cycle.
Larvae munching on a Milkweed leaf

'J' position getting ready to form the chrysallis

Butterfly Tent


If you are interested in reading more about Monarchs, here are some very good links:


Recent NY Times Article Detailing The Fight of Their Life

Monarch Watch (An Excellent Group Dedicated to Saving the Monarch with Ways You Can Help)


How to Purchase Monarch Cages


Monday, October 14, 2013

Pepita, Sunflower Seed, Almond & Sea Salt Brittle

Wonderful stuff and very suiting for this time of year, I present to you a nutty brittle with notes of cinnamon, cardamon & nutmeg and an ever so slight sprinkling of sea salt!

Ingredients:
1 1/2 c granulated sugar
3/4 c light corn syrup
1/4 c unsalted butter, room temperature
1 tsp ground cinnamon
1/4 tsp ground nutmeg
1/4 tsp ground cardamon
1/2 vanilla bean, seeds scraped & bean discarded
1 c roasted pepitas (pumpkin seeds) sprinkled w sea salt
1/2 c roasted & sliced almonds
1/2 c roasted sunflower seeds, sprinkled w sea salt

Place a sheet of parchment paper on a large cookie sheet; set aside.  Tear off another sheet of parchment paper the same size and put aside.  Have your rolling pin handy.  Spray a wooden spoon with cooking oil and set aside. Combine nuts together in a bowl. Include any salt that has fallen off the nuts.  Set aside.  This will save you much needed time later.

In a large saucepan add the sugar, corn syrup, butter, cinnamon, nutmeg, cardamon & vanilla bean seeds.  Heat over LOW heat stirring constantly until the sugar has dissolved and mixture starts to boil.  Attach a candy thermometer and continue cooking over LOW heat without stirring until the thermometer reaches 330*F.  Remove from heat immediately.  Quickly stir in nuts with the oiled spoon and pour out onto parchment covered cookie sheet. Spread with spoon as much as possible.  Cover the mixture with the loose parchment and with the rolling pin roll in each direction until the mixture is approximately 1/4" thick.  Let cool completely and break into pieces.  Brittle can be stored in an airtight container for up to a month.


Before ...
After ...


This recipe was adapted from The Brown Eyed Baker.

Munch a bunch o'brittle!


Lovely Lavender, My Favorite Herb, Color & Scent!


I have always had a love for everything lavender.  I have a fragrant garden near where I park my garden that encompasses roses, lilacs, lantana & lavender.  The lavender is growing close enough to the walkway that even if I don't stop and brush against the stems intentionally with my hands, my leg brushes against it or I step on it, unintentionally releasing it's fragrance.  It's such a unique fragrance, and calming at the same time.


The color lavender has always enticed me as well.  I'm drawn to it wherever I am.  I can't help it, it just really suits me and I so appreciate it. Makes me happy. If you've read any of my posts here, you'll see that my signature Butterfly B is in the color lavender (also included below).  I once even tried lavender contacts, but since I have brown eyes, the result was more grey than lavender, so it wasn't the result I was hoping for.  I've had lavender extensions put in my hair, two (2) of my tattoos incorporate the color lavender as does my bedroom and downstairs bath.  A couple years ago I came across the most amazing pair of lavender cowboy boots I've ever seen.  Unfortunately, I have a high instep and have always had trouble putting on boots that do not feature a zipper.  I really had to struggle to get those lavender boots on.  Once I did they seemed comfortable enough, but realistically, what I needed to go through just to put them on would have me preparing to leave the house at least 30 minutes earlier than normal just to allow time to put them on.  I kept them for about a week on display in my bedroom until I was finally able to part with them and returned them to the store.  Like they say, it's better to have loved and lost then never to have loved at all, although I'm not sure I agree.  Anyone who knows even a little about me associates me with lavender (among other things), and now so do you!

Recently I had a friend ask me for advice with regard to a pot of lavender she has that is thriving outdoors, but a cold freeze is predicted very soon.  After offering her a couple of ideas, I thought others might find it helpful as well, so I decided to blog a bit about this wonderful herb.

Firstly, lavender is a perennial herb that thrives in full sun and is quite drought tolerant.  Every part of the plant is edible if you like that sort of thing.  Oddly, I'm not all that adventurous, and think flowers should be used to brighten up a spot inside and outside and even a cake or a cupcake stand, etc., but I do not want to put them in my mouth.  I made lavender tea once, the color was as beautiful of a lavender color as you could imagine, but the taste was off-putting to me.  So I will keep lavender all around me, just not inside me. The only exception I make is Herbs de Provence. Lavender is in there, but with everything else that is going on, I don't notice it.

The buds are more popular for crafting than the leaves, although it's fine to use the leaves as well; especially if you are putting it inside of a pillow or sachet where it will not be seen.  If you don't mind the look of the leaves, then no need to hide them.

Following is a list of some of the ways to use lavender from your garden, should you so desire:

Dried bundles of lavender:  Cut it just above the brown woody part of the stem, tie them together near the cut end and hang upside down in a cool, dry location for about 2-3 weeks.  The reason you hang it upside down is to ensure the color stays in the buds as it dries; otherwise the color can fade out.  Always keep away from direct sunlight that can fade the buds and turn the stems brittle.


Lavender sachet:  Remove the buds from the stems and stuff inside a organza bag. Place in a lingerie drawer, closet, your car, or any place where you will enjoy the fragrance. Every once in a while pick the sachet up and massage it gently to release the oils and scent from the buds to refresh.

Lavender wreath:  I would actually recommend using the fresh cut lavender to attached to a grapevine wreath and letting them dry that way.  Otherwise, attaching already dried stems still works great!  Make small bundles first and attach them at an angle the way I did in the photo below.  Gives it more of a rounded look.


Lavender linen spray: Put some distilled water and lavender buds in a spray bottle.  Let sit out of direct sunlight for several days to a month, giving the bottle a shake every week.  Spray onto your sheets and pillowcase and have a wonderfully calm night's sleep.

Lavender glycerin soap:  Use a favorite recipe or find one online.  My recipe:  Melt glycerin soap base according to manufacturer's directions, mix in a couple tablespoons of buds and 1/2 tsp. of lavender essential oil.  Pour into molds until set and release.  If you like making soap, please visit my blog post on Calendula Oatmeal & Orange Glycerin Soap.

Lavender pillows & neck warmers (for those that sew):  Stuff lavender buds inside a small pillow along with the fiberfill before you close it up, or make a small, long, narrow pillow stuffed wit only the buds for the back of your neck.  Heat in the microwave.  Time will depend on the size and how stuffed the pillow is. Place on your neck to relieve stress.


Lavishly Loving Lavender,

Sunday, October 13, 2013

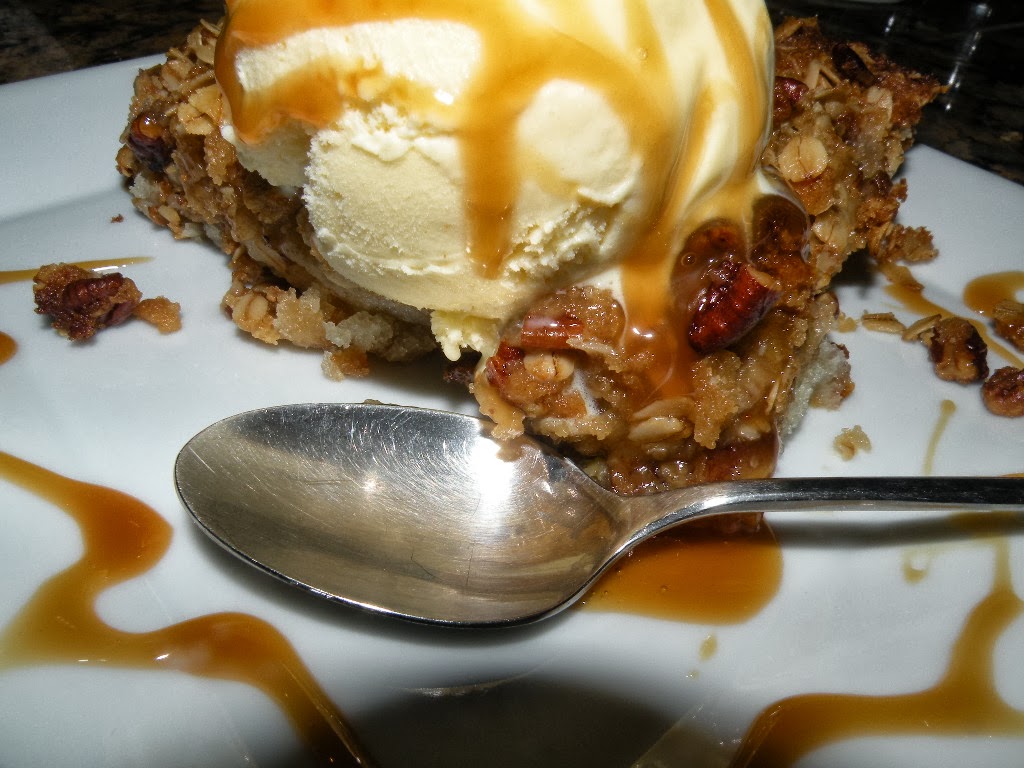
Banana Bread Cobbler

Ingredients:
1 1/2 c self-rising flour
1 c granulated sugar
1 c milk
1/2 c butter, melted
3/4 c packed light brown sugar
1/2 c butter, softened
1 c old-fashioned oats
1/2 c chopped pecans
4 ripe medium bananas, sliced
Vanilla ice cream & caramel topping, if desired

Preheat oven to 375*F. Spray 11x7 pan with cooking spray.
In medium bowl, mix 1 cup of the flour, sugar and milk with whisk just until blended. Stir in melted butter. Pour batter into pan.


In small bowl mix brown sugar, remaining 1/2 c flour and the softened butter with fork until crumbly. Stir in oats and pecans. Arrange banana slices over batter; sprinkle with oat mixture.
Bake 50 - 55 minutes or until golden brown and bubbly, covering with foil during last 10 minutes to prevent excessive browning, if necessary.  Serve warm with ice cream and drizzle with caramel topping.


Recipe featured in the Betty Crocker Fall Entertaining 2013 magazine.