Showing posts with label Craft. Show all posts

Monday, November 24, 2014

Holiday Ribbon Wreath


This wreath is a bit time-consuming but very easy and sort of mindless. However, it yields beautiful results.  I prefer wired ribbon as I can pinch and poke and tweak it to my liking.  This wreath can be made at any season or any time during the year, using appropriately colored ribbon.

Supplies:

1 12" wire wreath
50-60 yds. ribbon depending on how tightly packed you want it, cut into 6" lengths. I used 2 (3 yd) rolls each of 5 differently patterned wire ribbon.  You can use any combo you like.
Scissors

It's best if you cut all your ribbon first and stack it in front of you.  All you do then is tie the ribbon onto the wreath and fill it up. Whether you want to plan a pattern or attach randomly is your preference.


Have fun!

Tuesday, November 12, 2013

Wintry Scene (In and Out of Frame)

I took a frame I had, removed the glass, added some Christmas scrapbook paper, bottle brush trees and ephemera.  This once empty frame is now bursting with a beautiful wintry scene using supplies I had on hand.

Supplies I used:

Frame w/glass removed.  Any size will do.  I used a 5' X 5".
Christmas scrapbooking paper cut to size of glass
Assorted ephemera (stickers, metal embellishments)
Small bottle brush trees
Aleene's Glittering Snow
Paper glue
Glistening Mod Podge
Crystal Micro Beads
Ribbon for hanging, optional

Assemble according to photos or your own taste.  I glued one of the trees below the inside of the frame and carried the drifting snow beyond the frame as well.  If you have any questions about this project, please feel free to email me.


Believe!


Sunday, November 10, 2013

Snowy Pine Branch, Bird & Berries Swag


Simple to make and looks like you brought the outside in after a snow storm.  I saw a similar swag in a retail store for $30.00.  With my coupon, I went to Michaels and was able to get all the supplies I needed for under $20.00.  The snow was purchased from Wal-Mart.


Supplies:

2-4 pine branches, depending on how full you want the swag
Christmas picks with pine cones, icy branches and berries.
A bird of choice.  I used a Cardinal to coordinate with the berries.
Wire
Hot glue gun & glue sticks
1 can of snow

Cut the ends of the branches, if necessary, to eliminate the bulk.
Gather together and secure it with wire.  
Trim and wire all picks, if necessary.  Use the glue gun for smaller pieces.  Make a look with the wire and attach to the back for hanging.
When you have the swag assembled to please you, spray with snow, following directions on the can.  Spray heavier on the ends.  Let dry in between layers.
Hang over a doorway or a window and enjoy!

Don't forget to use your coupons for further savings!


Happy Holidays!


Tuesday, October 22, 2013

Felt Rosettes Heart & Wreath

Supplies:

8" x 8" frame covered with burlap (I purchased mine at JoAnn's)
12" x 12" squares of felt in various colors
Scissor
Hot Glue Gun
Glue Sticks

Cut strips across the felt squares in varying widths.  Roll up, glue end and attach to frame with hot glue.  I made mine different heights and rolled some tight and others loose (see photo).  I rolled approximately 36 strips in total (3 each of 12 colors).  I used about 20 to make the heart shape and added a 2nd row on top of the first.  I made one strip very loose and attached that as the middle point of the heart where the 2 sides come together.  I then crafted a 5-petal flower using 3 colors; each one slightly smaller than the first.  For the middle I cut a very thin strip, snipped it along the entire edge with scissors, rolled it up tightly and glued in the center.  Unfortunately, the lighting doesn't reflect the true colors.  They are somewhat darker than what appears in the photos here.

Variation:  I have also made grapevine wreaths covered with felt rosettes.

8" grapevine wreath with felt rosettes & flower


Have fun!


Wednesday, October 9, 2013

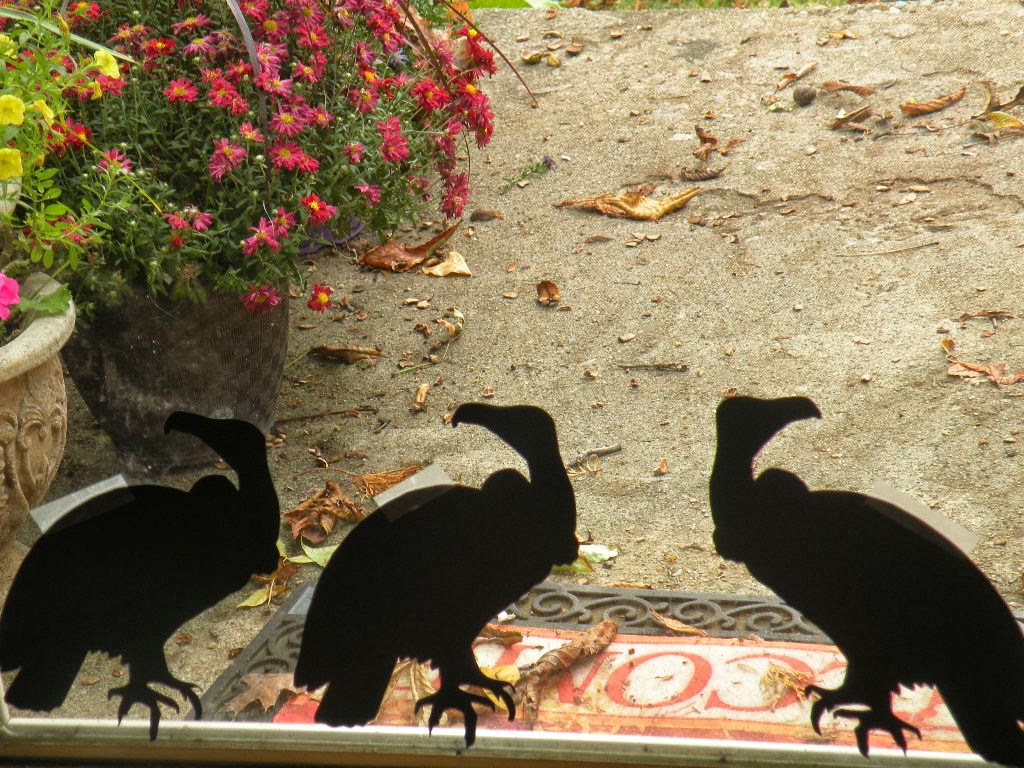
Buzzard Window Silhouettes

 These buzzards were so easy to make.  I used medium weight black scrapbooking paper, transferred the outline with a chalk pencil, and cut out 3 at a time with a pair of kitchen shears.  You can use a craft knife, but I would not suggest cutting through more than 2 at once.  I taped them to the window and the storm door, however, you can see the tape.  I have to buy some removable adhesive and adhere them that way, but did not have any on hand.

The template and directions are on The Graphics Fairy blog.


Wednesday, October 2, 2013

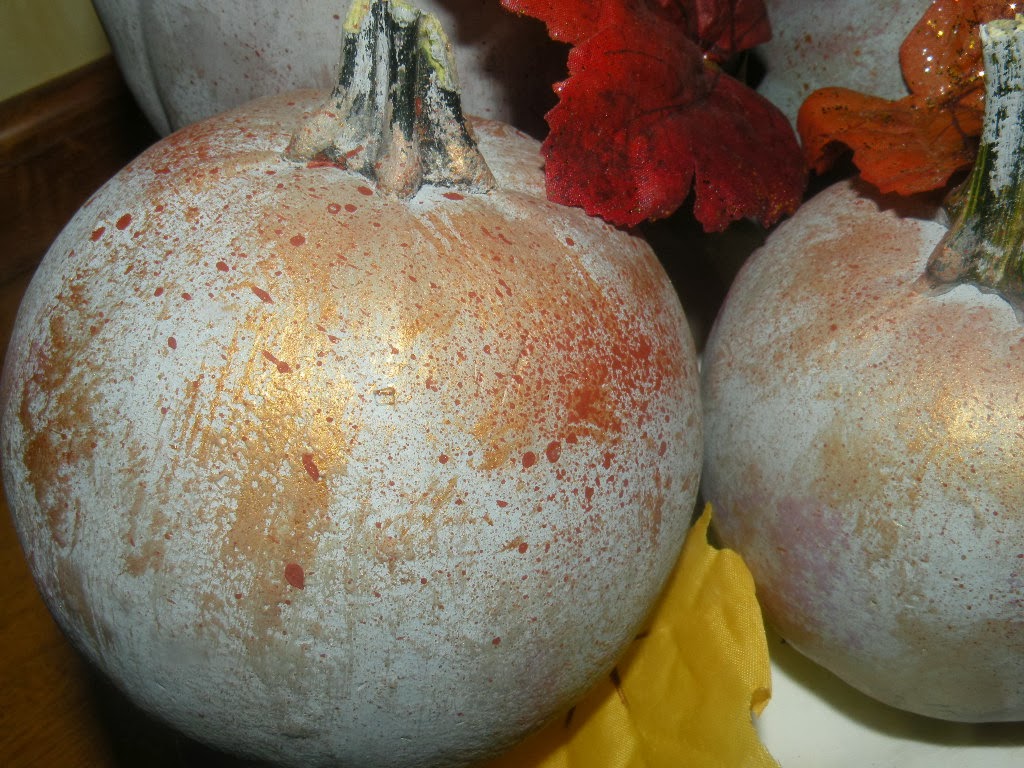
Painted Pumpkins Using Annie Sloan Chalk Paint


I purchased a small decorated pumpkin last year, and when I was putting up my Fall decorations I came a cross it.  I loved the look of it; the colors were great and I found myself admiring it and wishing I had bought more.  Lucky for me I'm a crafter, and what I can't buy I make!  I had one white vinyl pumpkin already waiting for something wonderful in my craft studio.  I also purchased 3 small sugar pumpkins from the local produce stand.


I decided to rely on my Annie Sloan Chalk Paint yet again and painted one Paris Grey, another Paris Grey with a dab of Aubusson Blue, another with Paris Grey and a dab of Duck Egg Blue and the last just Duck Egg Blue.  I shaded areas with mixtures of these colors; added some highlights and stippled darker variations here and there.  Then I began stippling on some acrylic colors such as gold, green, burgundy and even a little lavender!  


I then loosened up some Burnt Sienna with a little water.  With a toothbrush between my thumb and forefinger I speckled the pumpkins in different areas. I also loosened the gold paint and rather than add speckles I tapped the toothbrush over the pumpkins for larger splatters.  


After arranging them on a display stand, I added some glittered leaves to bring it all together.  Love!!


The display stand shown here is featured in a previous post.
The painter of pumpkins (and other things),


Tuesday, September 24, 2013

Wreath Made From Vintage Book Pages

Supplies:

Grapevine Wreath, any size
Book with Pages Removed (I used a book from 1934 for an antique look)
Scissors, straight edge, pinked or scalloped
Wooden spoon with round handle or a dowel, approx. 1/2" in diameter
Ribbon
Wire
Glue Gun & Glue Sticks

For the wreath pictured above, I used a 12" wreath and cut approx. 40 squares.  

Instructions:

Cut all pages so they are square.  The number of squares you'll need will depend on the size of your wreath and whether or not you want to cover the entire wreath or only part of it as I have done.  You can use standard straight edge, pinking shears or fancy edge scissors.  I used a scalloped edge.

Once you have finished cutting the squares, place the tip of the wooden spoon handle in the middle of each square and with your other hand go underneath the square and gather it up around the handle - giving it a crumpled cone appearance.

Next make yourself a bow and attach it to the wreath wherever you prefer with either wire or hot glue.  Leave the ends loose.  I also made 10 2" loops and trimmed the ends to insert after all the book pages are attached.

Now attached the book pages.  I started around the bow and then filled in above and below it.  Once I added all the pages I wanted I added a dab of blue to each loose end of the bow and attached them in place for a flowing look.  I continued that look by then attaching the 10 loops above and below the bow.

Add a loop from ribbon or wire to the back of your wreath and it's ready to hang!


I hope you give it a try.  It's fairly quick and very easy.

Enjoy!


Tuesday, August 27, 2013

Fall Arrangement in a Pumpkin Basket

My first craft for Fall is this wonderful arrangement made with supplies purchased on sale from Michaels Arts & Crafts.  The basket and the florist's foam were not on sale, but all the floral stems were.  The basket was $14.99, but I used my 40% off coupon to help with that.


Supplies I Used:
1 large Pumpkin Basket w Grapevine Handle and Bittersweet around the rim
1 round florist's foam to fit inside
1 large feathery type stem as the focal point
A variety of stems that caught my eye, including foam berries, leaves & acorns
Excelsior to cover the openings & hide what lies beneath
A woodland owl as the main accent rather than a bow

Directions:
Remove all the tags from your stems so you're ready to go!
Place the foam inside the basket and seat snugly on the bottom.  Note: You may have to cut the foam in half and place one half in at a time to make it fit.
Start with your focal stem.  In my case it was the large feathery one.  I placed that in the middle and to the back of the handle.
Fill in with the next largest stem(s) and continue, ending with the smaller stems.
Once you have it arranged the way you like, take the excelsior and stuff in all around the stems so you hide the bottom of the stems and the foam.
Now, add your accent piece. Ta da!

Stand back, admire and let out a big sound of satisfaction!  Now go find that perfect spot in your house for it and be proud of what you just created!

Creatively yours,